Contents
What is the Hazard Perception Test?
The hazard perception test is the second part of the driving theory test set by the DVSA, first introduced in 2002. It is a computer-based test which measures a driver’s ability to recognise and react, in advance, to events developing on the pavement or road, thereby reducing the risk of having to take emergency action.
As drivers gain more experience, they become better adept at learning how to spot and react to hazards i.e. situations that requires a change of direction, a change of speed or a sudden emergency stop. Learner drivers may initially struggle with these scenarios, hence the requirement of the hazard perception test to examine a candidate’s ability to react to situations that may be potentially dangerous.
Why was it Introduced?
The hazard perception test was introduced to encourage learner drivers to specifically improve their hazard awareness skills with the goal of reducing the number of accidents after passing.
Statistics show that newly qualified drivers are more likely to be involved in a collision and more likely to be the party at fault. Research suggests that the hazard perception test has had some impact in reducing the number of incidents in the first year of driving. The full Department for Transport report can be read here.
What is a Developing Hazard?
A developing hazard is a situation that causes you, the driver, to adjust your course by changing speed or direction, in order to avoid a collision.
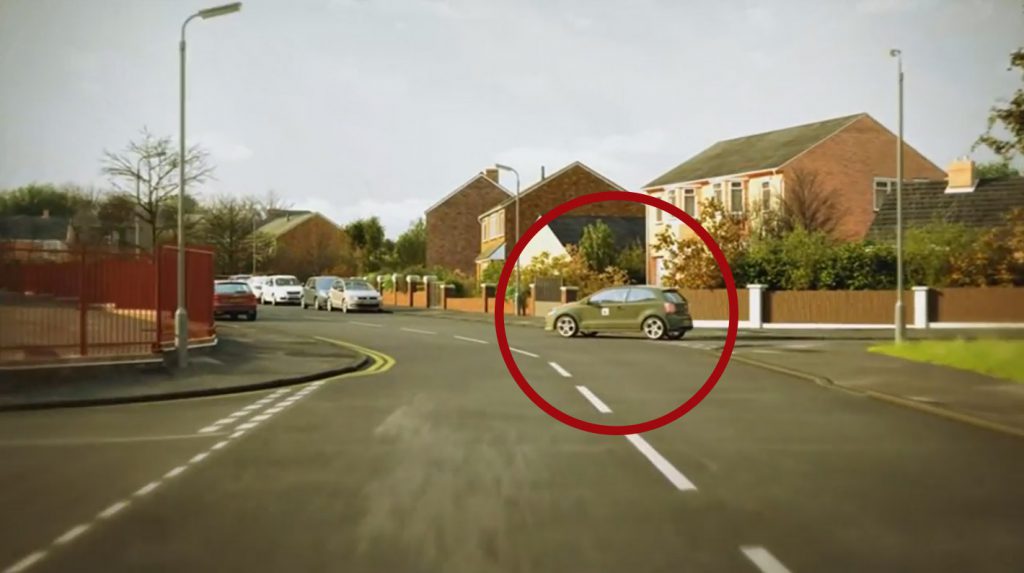
For example: A car parked on the side of the road wouldn’t be considered a developing hazard. Responding to a scenario like this during your test wouldn’t score you any points. However, as you get closer, you spot the car starting to pull away ahead of you causing you to slow down. The car would now be classed as a developing hazard as it caused you to take action. Responding at this point during your test would score you points.
See the illustration below:

The Hazard Perception Test Examination Process
The UK driving theory test begins with the 50 question multiple choice section, followed by the hazard perception test. There is an optional three-minute break between the tests, which you are advised to take to allow time to compose yourself. You aren’t permitted to leave your seat during this break. The hazard perception test lasts for approximately 20 minutes.
Before the start of the test, an introductory video will be played (shown above) explaining how the test works and giving you instructions on how to complete the test. You will then have the option of watching this video again or starting the test immediately. The video may be worth a second viewing to ensure you fully understand what you need to do and to give yourself some more time to compose yourself.
The hazard perception test comprises of 14 silent computer-generated image (CGI) video clips, each lasting 60 seconds, shown from the point of view of the driver. There will be 15 developing hazards in total, meaning one video clip will contain two developing hazards. You will not be given prior notice of which video contains the extra hazard, so you will need to maintain concentration throughout the duration of each clip.
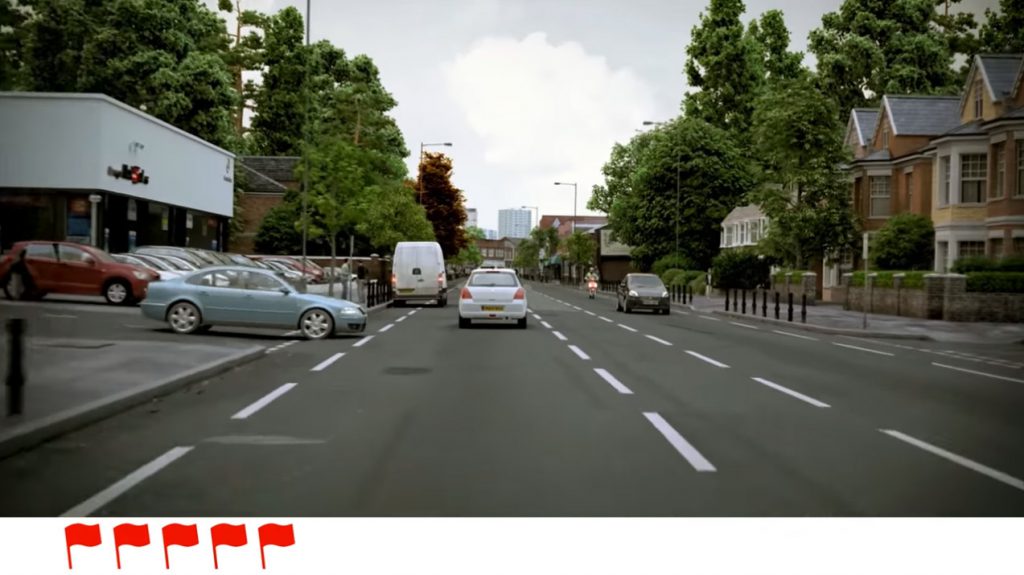
Once the hazard perception test begins, you need to click the mouse using either the left or right button as soon as you see a developing hazard (some test centres use a touch screen). Each time you respond to a video, a red flag will show to indicate that the computer has recorded your response.
Each video starts with a freeze frame and a countdown of ten seconds before the clip starts. This gives you time to assess the situation and take note of the environment, ascertaining whether it’s urban or rural for instance. This can give you an idea of what type of hazard to expect. For example, a town setting may have hazards involving pedestrians, cyclists or other vehicles, whereas a rural scene could have ramblers walking in narrow country lanes or animals in the road. Remember, you will only see each video clip once, and you won’t be able to return to or repeat previous videos.
The Hazard Perception Test Scoring Process
How quickly you respond to the developing hazard will determine what score you receive, with a potential of 75 points being available. You need at least 44 points to pass. Each clip has a maximum of five points, with the highest score awarded if you click the mouse just as the developing hazard appears. Each video has a window of time, which is divided into five equal segments; your score will be assessed dependent on when you click within the time frame. You can achieve between one and five points for each clip, with the lowest score awarded if you don’t click until the scene has developed into a full-blown hazard, and it is too late to avoid the situation. If you don’t click the mouse at all during the video, you will not score any points.
See an illustration of the scoring mechanism below:


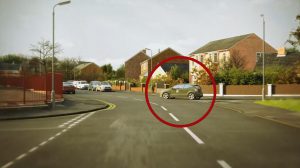
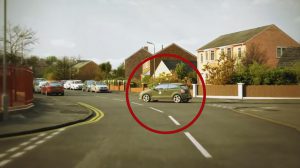
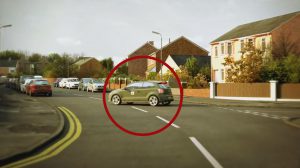
In the first screenshot, the car at the junction is regarded as a potential hazard. If you click at this point, you won’t score any points as the car won’t cause you to change speed or direction in its current position. As the car emerges from the junction, it becomes a developing hazard. Clicking as soon as the vehicle crosses the junction would score you the maximum 5 points. The longer you take to react and the closer you get to the vehicle without clicking, the less points you will score.
You are encouraged to click more than once without any penalties, although it is only the first click that counts, providing the scene shows a developing hazard. You can click again each time you recognise the hazard becoming increasingly dangerous. You don’t need to point the cursor at the site of the hazard, you just need to click to indicate you have spotted a developing hazard. At the end of each video, the screen will go blank for a few seconds, before the next clip appears with its freeze frame and countdown timer.
When to Click
As you watch the video, you should click with the mouse every time you spot something that you think is developing into a hazard or could develop in to a hazard. To score maximum points, it is very important that you click as early as possible. Equally important is that you click each time the hazard develops or changes in any way. The reason you must do this is that it is possible that even though you have spotted that hazard and clicked, you will have clicked before the DVSA think the hazard has started to develop, and will therefore score zero unless you click again, later on in the hazard’s development.
By clicking more than once, as the hazard develops, you increase your chance of scoring. Only your best score is retained, and so long as you don’t click repeatedly, you will not be ‘penalised’ for clicking too many times.
How to Avoid Cheating
With that being said, if you click repeatedly with the hope of scoring maximum points, you may be penalised and you won’t be awarded any points for that particular clip. You will see the following message if the system detects a pattern of clicking which it considers as ‘cheating’:

There is a fine line between clicking enough times to be sure that you score maximum points and clicking so often that the test software considers that you were cheating. To stay on the right side of the line, you should:
- Try to avoid clicking more than 3 times for any one hazard
- Avoid clicking in a pattern
- Click deliberately; avoid clicking two or three times in rapid succession
Remember it is developing hazards that you are looking for. An empty parked car with nobody near it is a hazard that you will need to negotiate, but it is not a developing hazard on its own. A parked car in the distance with its indicators on and its brake lights showing clearly could be about to pull out into your path, and therefore could well be a developing hazard. Try to click only on those things that are or could be developing hazards and to limit the number of times you click on static hazards.
This may seem easier said than done, but study and practice will help you to succeed.
After the Hazard Perception Test
Following completion of the hazard perception test, you will be directed to leave the room and within approximately ten minutes, you will be given your score. Remember, you need to pass both the multiple choice section and the hazard perception test, or you will need to take them both again. If you fail the hazard perception test, there is no need to worry as it is considered the more difficult part of the theory test.
Types of Hazards to look out for
In each hazard perception clip, you will come across a wide range of potential hazards just as you might see on the road. The following list is not intended to be exhaustive – but it links road scenarios to probable sources of hazards.
General
- Road signs, they are often related to a specific hazard ahead
- Pedestrians that could be a hazard, e.g. children and older people
- Cyclists & motorbikes – as other road users do not always see them
- Cyclists (particularly young cyclists) often have not had any road training and deserve your extra care and attention
- Emergency vehicles
- Poor visibility – especially bright winter sun, low in the sky
- Poor road conditions – rain, fog, ice, snow
- Blind bends
- Lane changing – especially vehicles that are swerving to avoid hazards in their path or pulling out of junctions.
Residential streets
- Cars pulling out
- Children playing near the road
- Pedestrians stepping out from in-between cars
- Cars pulling out of side roads. Especially those with restricted views
- Pedestrians crossing roads without looking (and stepping out onto zebra/pelican crossings)
- Cars stopping to park
- Oncoming vehicles
- Traffic restrictions
Motorways
- Cars breaking down
- Cars leaving the motorway
- Cars changing lanes to overtake slower traffic
- Cars joining the motorway
- Emergency vehicles
- Stationary traffic / road works
- Traffic travelling much more quickly or much more slowly
Roads near schools
- Children playing near the road (especially if they are kicking a football around)
- Children crossing without looking
- Crossing patrols and other forms of crossing
- Children cycling on the pavement
- Ice cream vans
Country roads
- Single lane roads
- Farm traffic
- Animals – especially horses & riders, cows, sheep, etc.
- Blind bends
- Objects in the road – especially manure, mud, hay, water, etc.